Hi dolls,
I feel like everyone has heard of Glamglow (If you haven’t check out the product line here).
The hype for this face mask is huge! I was a bit skeptical at first, I thought it was another Pinterest fad, but then I had the chance to try the mask, and I was immediately converted from a skeptic to a Glamglow enthusiast. I honestly wasn’t sure if I could bring myself to pay $69 for a small jar of mud, albeit very magical, amazing mud, but mud nonetheless.
I immediately took to Pinterest to find a dupe or a DIY version. After a bit of searching I found a DIY version that I felt wasn’t to crazy with the ingredients, and then I pinned it and forgot about it for about a year and half..please tell me I’m not the only one who does this. I revisited the pin (here is the recipe I based our masks off of) recently and my best friend and I decided it would be a good idea to try it out.
I ordered a lot of my ingredients off of Amazon, and in turn realized I probably spent about $30 trying to save money on a $60 mask. However I guess I’m ok with it since I have all the things I need to make the mask again.
I really enjoyed the mask, it had a slight tingling feeling and after I rinsed it off my face felt soft and very hydrated. I also noticed that I had less of an oily T-Zone for the next couple days.
GlamGlow Face Mask: DIY
(I’ve created links to each of the ingredients on Amazon if you are having trouble finding them.)
- 2.5 Tbsp Coconut Oil
- 1/4 cup Bentonite Clay
- 8 Capsules of Activated Charcoal
- 1 Tbsp Aloe Vera ( You can use fresh, I used 99.9% gel)
- 4 oz or 8 Tbsp Chamomile Tea (measure it first. Add more if needed)
- 3 Drops Peppermint Essential Oil ( in all honesty I’m not sure what constitutes a drop. I probably used more)
- 2 Drops Eucalyptus Essential Oil

- Start by steeping your tea in 4oz (8 Tbsp to save you a trip to Google) of hot water. You want the tea to be steeped pretty strong, so always start with this that way it can cool as well.
- Melt the Coconut Oil into a liquid.
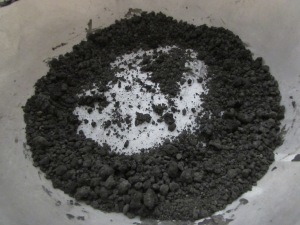
- In a big enough bowl, combine all of the ingredients except the tea mix together. It should look something like this. Basically..it looks like gray dirt, so work toward that. Also don’t be like me and ruin a nice white mixing bowl, the Bentonite Clay stains pretty badly, plan accordingly.
- Slowly add the cooled tea, mix as you go. Make sure it is cooled! Also I recommend making a little more than 4 oz I needed a little extra to get the right consistency, and if you have to much you can always drink it later.
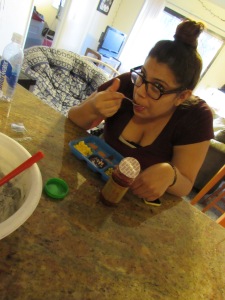
- Once you get the right consistency, it should be nice and creamy. Transfer the mix into a glass container of some sort, (I used a mason jar) and set it in the fridge for an hour. Then wonder why your best friend is eating a kid cuisine instead of helping you make the mask.
- You are ready to use it now! Once you have gotten your glow on, be sure to store it in either a cool dry place, or the fridge preferably to prevent mold and drying out.

I try to use a mask on my face at least once a week, I do this one every other week. I hope you all enjoy this mask! Let me know what you think!
xoxox
